DIY T-shirt Produce Bag! | T-Shirt.ca
Best day ever! It is Make It Monday!
Today, we are going to make a super convenient and eco-friendly re-usable produce bag. Shopping bags are all the rage right now. But what are you supposed to use for smaller items, like fruit and veggies? The only options are to put them straight into your cart/basket. But it is much more sanitary to have them in a bag. But you also want to make sure they can stay fresh when you get home!
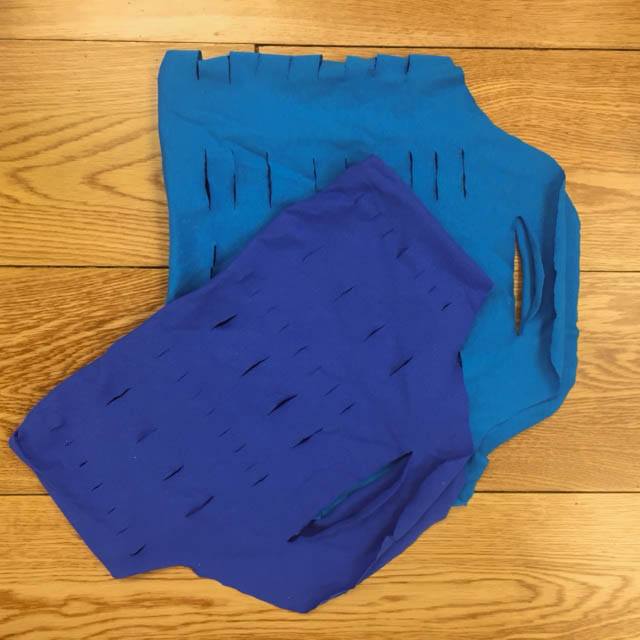
In comes the re-usable produce bag! Perfect for throwing your fruits and veggies in at the grocery store, and the vents throughout the bag let fresh air pass through and doesn't stifle your produce at home so it stays fresh longer!
We were excited about this one, and cannot wait to use our bags on our next grocery trip!
or this DIY you will need:
t-shirt
-scissors
-fabric glue
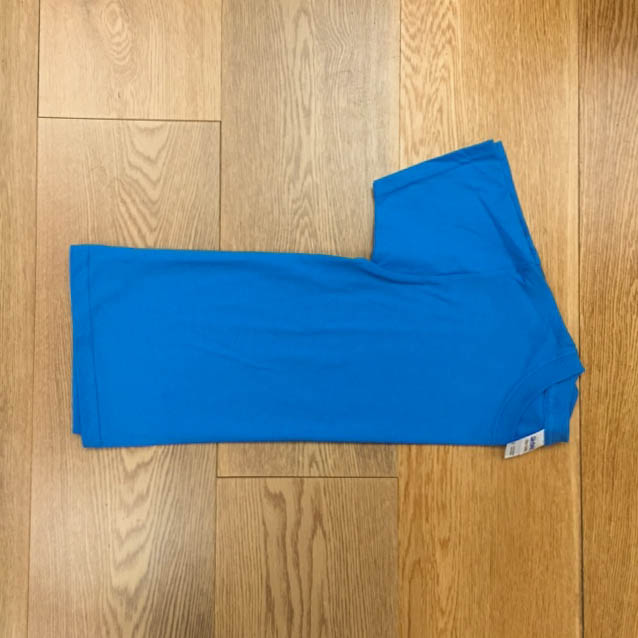
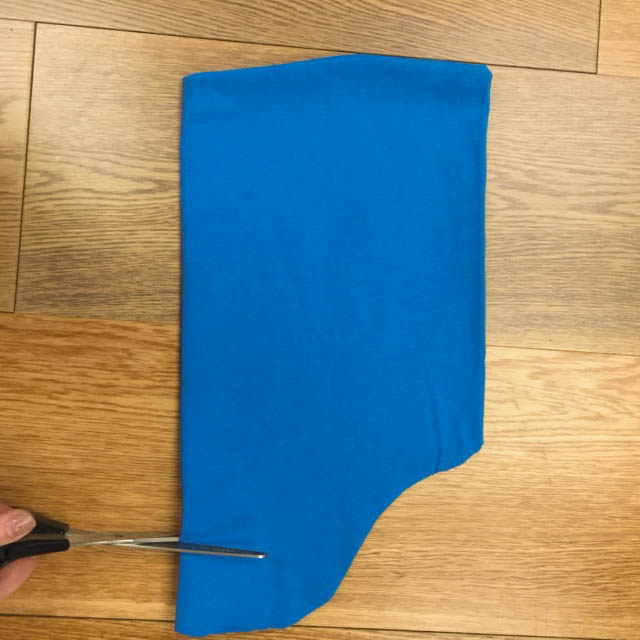
1. Take your tshirt and fold it in half length wise. Turn it so that the hem is on your left and the collar is on the right.
2. Make one cut a couple inches below the collar. Make sure to curve it slightly along the the sleeve. Also, make sure to go through both layers of the shirt, very important.
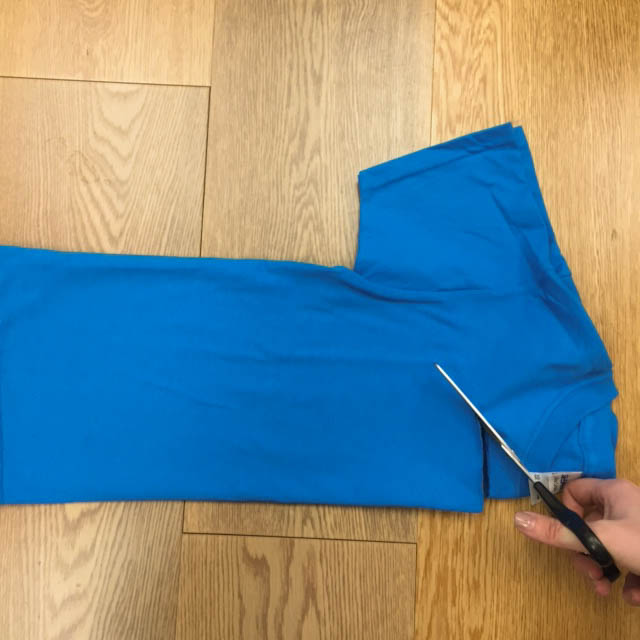
3. Turn the shirt, so that the hem is now on the right side. Cut the hem off!
4. Unfold the shirt and turn the shirt inside out.
5. Now, we are going to add fabric glue to the bottom of the bag. Flip one side of the shirt up, and add a small layer of glue to the very bottom.
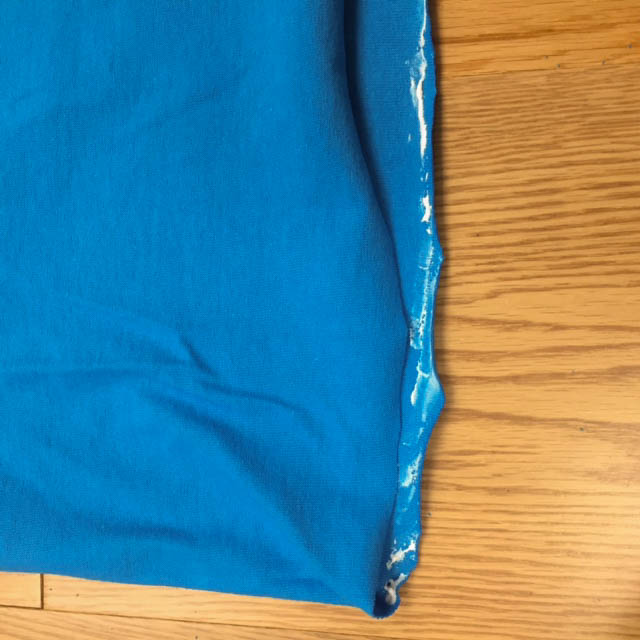
6. Now fold the top layer back so that both layers will be glued together. Press down so that the glue really sticks to both layers. You don't want your produce falling out all over the place!
7. Let this dry, before you move on to the next step!
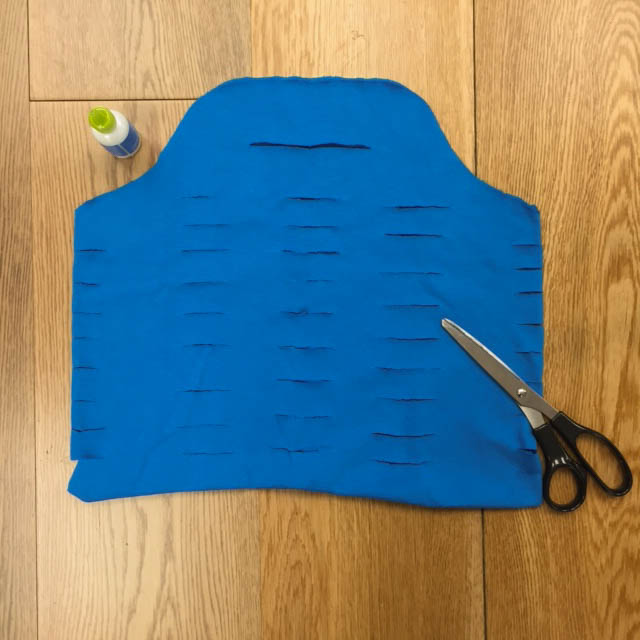
8. Turn the bag right side out. Now we will make the handle and vents!
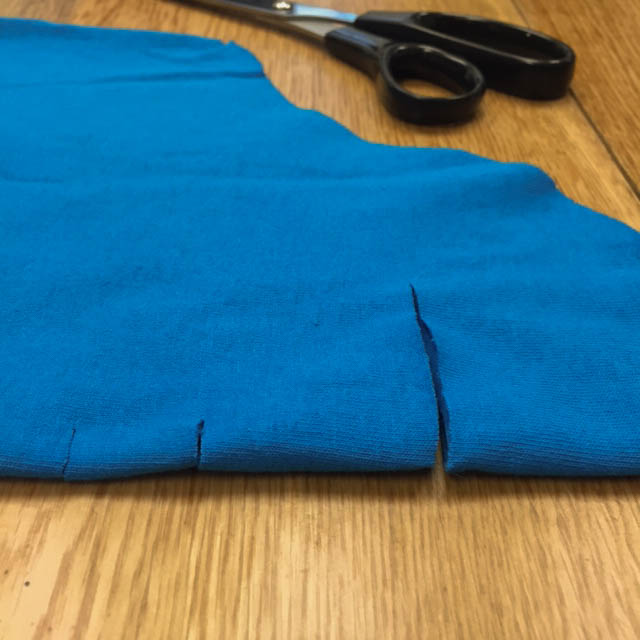
9. Fold the shirt in half lengthwise again.
10. At the top of the bag, make one cut about 2 inches down from where the collar was. Don't cut all the way through, or the handle will be too wide and could rip when you use it. Only make the cut about 1-1 1/2' long.
11. Now for the vents! Start at the bottom of the bag and make little snippets up towards the handle. About 1 inch apart. I made 9 slits myself, but you can make however many you want. Note that the closer the vents, the higher the risk of rips!
12. Unfold the bag so that it is flat. Now fold over the right side so that the edge is smack in the middle. Make your slits along the side of this fold now. Again, I made 9 slits.
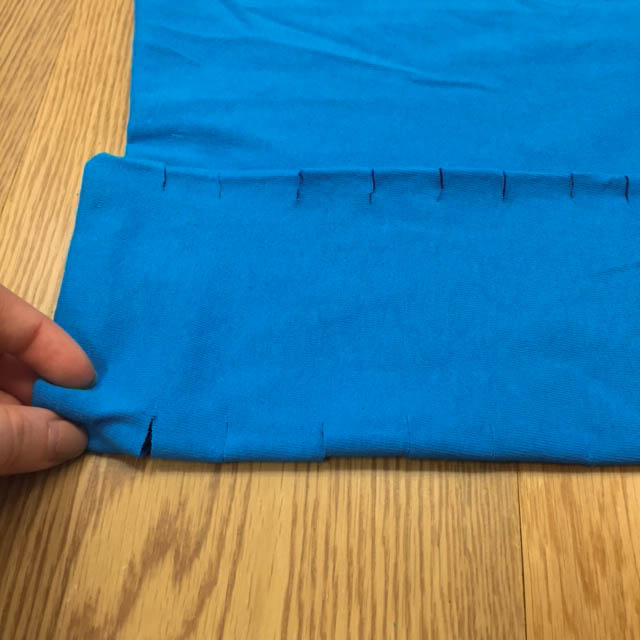
13. Unfold the shirt again and cut along the natural side of the bag.
14. Repeat steps 12 and 13 on the other side!
15. Unfold your bag and stretch it out.
16. Take it to the grocery store/farmers market/fruit stand and fill it with all your favourite produce! :)
Happy crafting!
Recent Posts
-

Best-selling Unisex Jacket: the Champion Packable Quarter-Zip
Meet our top-seller: The Champion CO200 Packable Quarter-Zip Jacket! It's lightweight, wind-and wate …4th Jan 2024 -

Happy New Year from the T-shirt.ca Team!
Kickstart 2024 in style with our AC1010 Acrylic Knit 12" Toque with Cuff - the perfect blend of time …3rd Jan 2024 -

2023 Wrapped: A Year in Review with T-shirt.ca!
What did your 2023 look like? ?✨?28th Dec 2023